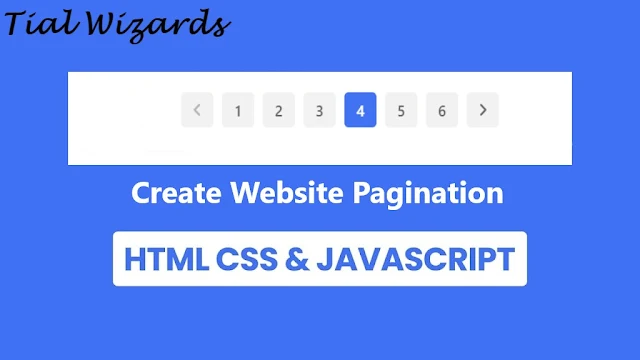
How to Create Pagination for Website in HTML, CSS and JavaScript
Hi to all, in this article I am going to tell you all about how to create pagination for website in HTML, CSS and JavaScript easily in just few minutes.
You may have noticed that the website has a pagination part at the end that allows you to navigate to the next webpage.
What is Pagination?
The process of dividing digital content into distinct web pages is known as pagination.
By clicking on links, which are frequently represented by numbers at the bottom of a page, users can move between these sites.
Content that is paginated usually has a similar theme or objective.
Did you know that JavaScript, HTML, and CSS can be used to produce that pagination? No then read this article completely.
How to Create Pagination for Website
The below are the detailed steps provided to create a simple website pagination in HTML, CSS and JavaScript.
- Make a folder. You can create the aforementioned files inside of this folder and give it any name you choose.
- Make a file named index.html. The file extension must be .html.
- Make a file named style.css. its extension must be included in the file name as .CSS.
- Make a file named script.js. The file extension must be .js.
To begin, add the following HTML codes to your index.html page so that the password validation has a basic layout.
Remember that you will also need to make comparable modifications to the JavaScript code if you decide to rearrange the requirements in your password validation checklist.
Adding HTML Code:
First of all open index.html file
Copy below provided code and paste it inside index.html file
<!DOCTYPE html>
<html lang="en">
  <head>
    <meta charset="UTF-8" />
    <meta http-equiv="X-UA-Compatible" content="IE=edge" />
    <meta name="viewport" content="width=device-width, initial-scale=1.0" />
   <title>Pagination in HTML CSS & JavaScript</title>
    <link rel="stylesheet" href="style.css" />
    <!-- Fontawesome CDN Link -->
    <link rel="stylesheet" href="https://cdnjs.cloudflare.com/ajax/libs/font-awesome/6.2.1/css/all.min.css" />
  </head>
  <body>
    <div class="container">
      <button class="button" id="startBtn" disabled>
        <i class="fa-solid fa-angles-left"></i>
      </button>
      <button class="button prevNext" id="prev" disabled>
        <i class="fa-solid fa-angle-left"></i>
      </button>
      <div class="links">
        <a href="#" class="link active">1</a>
        <a href="#" class="link">2</a>
        <a href="#" class="link">3</a>
        <a href="#" class="link">4</a>
        <a href="#" class="link">5</a>
      </div>
      <button class="button prevNext" id="next">
        <i class="fa-solid fa-angle-right"></i>
      </button>
      <button class="button" id="endBtn">
        <i class="fa-solid fa-angles-right"></i>
      </button>
    </div>
    <script src="script.js" defer></script>
  </body>
</html>
Adding CSS Code:
First of all open style.css file
Copy below provided code and paste it inside style.css file
@import url(https://fonts.googleapis.com/css2?family=Poppins:wght@200;300;400;500;600;700&display=swap);
*{margin:0;padding:0;box-sizing:border-box;font-family:"Poppins",sans-serif}
body{height:100vh;background:#4070f4}
body,.container,.button,.links,.link{display:flex;align-items:center;justify-content:center}
.container{padding:20px;border-radius:8px;column-gap:12px;background:#fff;box-shadow:0 5px 10px rgba(0,0,0,.1)}
.button{border:none}
.button i{pointer-events:none}
.button:disabled{color:#b3b3b3;pointer-events:none}.button,.link{height:45px;width:45px;font-size:20px;color:#666;background-color:#f2f2f2;border-radius:6px;cursor:pointer}
.links{column-gap:12px}
.link{font-weight:500;text-decoration:none}
.button:hover,
.link:hover{color:#fff;background:#4070f4}.link.active{color:#fff;background:#4070f4}
Adding JavaScript Code:
First of all open script.js file
Copy below provided code and paste it inside script.js file
// Selecting DOM elements
const startBtn = document.querySelector("#startBtn"),
  endBtn = document.querySelector("#endBtn"),
  prevNext = document.querySelectorAll(".prevNext"),
  numbers = document.querySelectorAll(".link");
// Setting an initial step
let currentStep = 0;
// Function to update the button states
const updateBtn = () => {
  // If we are at the last step
  if (currentStep === 4) {
    endBtn.disabled = true;
    prevNext[1].disabled = true;
  } else if (currentStep === 0) {
    // If we are at the first step
    startBtn.disabled = true;
    prevNext[0].disabled = true;
  } else {
    endBtn.disabled = false;
    prevNext[1].disabled = false;
    startBtn.disabled = false;
    prevNext[0].disabled = false;
  }
};
// Add event listeners to the number links
numbers.forEach((number, numIndex) => {
  number.addEventListener("click", (e) => {
    e.preventDefault();
    // Set the current step to the clicked number link
    currentStep = numIndex;
    // Remove the "active" class from the previously active number link
    document.querySelector(".active").classList.remove("active");
    // Add the "active" class to the clicked number link
    number.classList.add("active");
    updateBtn(); // Update the button states
  });
});
// Add event listeners to the "Previous" and "Next" buttons
prevNext.forEach((button) => {
  button.addEventListener("click", (e) => {
    // Increment or decrement the current step based on the button clicked
    currentStep += e.target.id === "next" ? 1 : -1;
    numbers.forEach((number, numIndex) => {
      // Toggle the "active" class on the number links based on the current step
      number.classList.toggle("active", numIndex === currentStep);
      updateBtn(); // Update the button states
    });
  });
});
// Add event listener to the "Start" button
startBtn.addEventListener("click", () => {
  // Remove the "active" class from the previously active number link
  document.querySelector(".active").classList.remove("active");
  // Add the "active" class to the first number link
  numbers[0].classList.add("active");
  currentStep = 0;
  updateBtn(); // Update the button states
  endBtn.disabled = false;
  prevNext[1].disabled = false;
});
// Add event listener to the "End" button
endBtn.addEventListener("click", () => {
  // Remove the "active" class from the previously active number link
  document.querySelector(".active").classList.remove("active");
  // Add the "active" class to the last number link
  numbers[4].classList.add("active");
  currentStep = 4;
  updateBtn(); // Update the button states
  startBtn.disabled = false;
  prevNext[0].disabled = false;
});
To make it easier to read and follow along, I have included comments to each line of code in the JavaScript sample. Please feel free to leave a comment on mail or through contact page if you need any explanation or if you have any queries. I will try my best to assist you.
Demo
Conclusion
I hope that you all have understood about creating simple pagination for website easily in just few minutes.
You can also modify the codes according to your requirement and make sure all the codes are placed in correct files and add proper comments for the code to identify the purpose of code is added.


