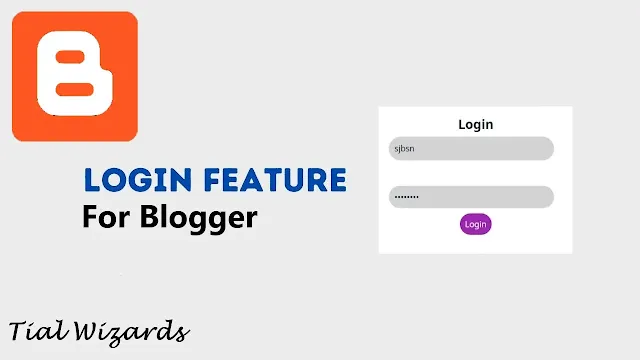
How to Add Login Page in Blogger | Add Login Feature in Blogger
Hi to all, in this article I am going to tell you all about how to add login feature in blogger website easily in just few minutes.
By adding this login page in your blogger website, you can restrict the users to visit the page and also through this you can earn money by taking some revenue and then you can add username and password and then you can send username and password to registered users.
So, read the below provided steps carefully and completely to get clear understanding about adding login feature in blogger website easily without any error.
Steps to Add Login Feature in Blogger Website
Step-1: First of all login to your blogger website dashboard by using your login credentials.
Step-2: Before proceeding further, make sure you have backup of your website theme for future use and to backup your website theme, you can follow the below provided path.
Blogger website dashboard -> Click on theme section -> Click on arrow icon -> Click on backup -> Click on download -> Verify captcha -> Save file in safe place for future use.Step-3: Now you need to open your website theme editor section and to open it you can follow the below path.
Blogger website dashboard -> Click on theme section -> Click on arrow icon -> Click on Edit HTML -> Blogger theme editor section.Step-4: In theme editor search for ]]></b:skin> and paste the following CSS code code just above it and click on save icon to save the complete code.
/* Login feature by Tial Wizards*/
.lgn{width:100%;height:100%;position:fixed;left:0;top:0;z-index:9999999999;background:flat;background-color:#f3f5fe;background-size:400% 400%;animation:gradient 10s ease infinite}@keyframes gradient{0%{background-position:0 50%}50%{background-position:100% 50%}100%{background-position:0 50%}}.lgn.hidden{display:none}#lgnid{position:absolute;border-radius:8px;width:400px;padding:30px;display:block;transform:translate(-50%,-50%);top:50%;left:50%;background:flat;background-color:#fff;transition:all .5s ease;border-radius:20px}.lgnttl{font-size:25px;font-weight:700;text-align:center}#lgnid input[type=text],#lgnid input[type=password]{padding:10px;border-radius:40px;margin:10px 0;width:95%;border:1px solid rgba(255,255,255,.2);background:#d3d3d3}#username::-webkit-input-placeholder,#password::-webkit-input-placeholder{color:#000}#lgnid input[type=text]:focus,#lgnid input[type=password]:focus{outline:none}button.login{color:#fff;padding:10px;border-radius:40px;border:none;outline:none;background:#9c27b0;transition:1.5s}
button.login:hover{background-color:red;transition:.5s}@media screen and (max-width:480px){#lgnid{width:350px}}.red{color:red}
Step-5: Now you need to open page or create a page, to add the login code in it.
Step-6: After opening the page, make sure that you have changed the compose view to HTML view and.
Step-7: Now copy below provided HTML code and paste the copied HTML in the page.
<!--[ Login feature ]-->
<div class="lgn">
<div id="lgnid">
  <div class="lgnttl">Login</div>
    <input id="username" type="text" /><br />
    <input id="password" type="password" />
    <br />
  <center><button class="login" onclick="startlog()">Login</button></center>
    <p id="access"></p>
</div>
</div>
Step-8: Again copy below provided JavaScript code and paste the copied JavaScript code just below the HTML code.
<script>
var storeS=localStorage.getItem("users");if(null==storeS){var users=[{username:"STW",password:"123456"},{ username: 'username_here', password: 'password_here' }];localStorage.setItem("users",JSON.stringify(users))}function getUserUsername(e){return JSON.parse(localStorage.getItem("users")).filter(t=>t.username===e)}function ceklog(){var e=localStorage.getItem("login");null!=e&&"true"==e&&document.querySelector(".lgn").classList.add("hidden")}function startlog(){var e=document.querySelector("#username").value,t=document.querySelector("#password").value;getUserUsername(e.trim()).length>0?getUserUsername(e.trim())[0].password==t.trim()?(document.querySelector(".lgn").classList.add("hidden"),localStorage.setItem("login","true")):document.querySelector("access").innerHTML="<p class='red'>Wrong username or password!</p>":document.querySelector("access").innerHTML="<p class='red'>User not found!</p>"}ceklog();const show=()=>{var e=document.querySelector("#password"),t=document.querySelector(".icon1"),r=document.querySelector(".icon2");"password"===e.type?(e.type="text",r.style.opacity="1",t.style.opacity="0"):(e.type="password",r.style.opacity="0",t.style.opacity="1")};
</script>
If you want to add more users to login for your page or post then you need to follow the below process.
Mainly you can add more users by adding using the below provided code.
{ username: 'username_here', password: 'password_here' }
Step-9: You can refer the below code as an example and you can add so many users like this and restrict your post or page from others to read and you can earn some revenue by adding the login feature in your blogger website.
<script>
var storeS=localStorage.getItem("users");if(null==storeS){var users=[{username:"STW",password:"123456"},
{ username: 'username_here', password: 'password_here' }];localStorage.setItem("users",JSON.stringify(users))}function getUserUsername(e){return JSON.parse(localStorage.getItem("users")).filter(t=>t.username===e)}function ceklog(){var e=localStorage.getItem("login");null!=e&&"true"==e&&document.querySelector(".lgn").classList.add("hidden")}function startlog(){var e=document.querySelector("#username").value,t=document.querySelector("#password").value;getUserUsername(e.trim()).length>0?getUserUsername(e.trim())[0].password==t.trim()?(document.querySelector(".lgn").classList.add("hidden"),localStorage.setItem("login","true")):document.querySelector("access").innerHTML="<p class='red'>Wrong username or password!</p>":document.querySelector("access").innerHTML="<p class='red'>User not found!</p>"}ceklog();const show=()=>{var e=document.querySelector("#password"),t=document.querySelector(".icon1"),r=document.querySelector(".icon2");"password"===e.type?(e.type="text",r.style.opacity="1",t.style.opacity="0"):(e.type="password",r.style.opacity="0",t.style.opacity="1")};
</script>
Step-10: After adding the codes inside the page or post, click on publish or update to show to your website users.
Note:
If you want to change the colors and styles of the login buttons, then you have to change the CSS code and for changing colors you need to replace the color codes, and for color codes you can use google color picker or any other third party color picker website.
After adding the username and password in the JavaScript, you need to encrypt it or put a lock to it so that it will not visible to other users who want to access the page.
Conclusion
I hope that you have understood about adding login feature in blogger website in just few minutes by using simple HTML, CSS and JavaScript codes.


