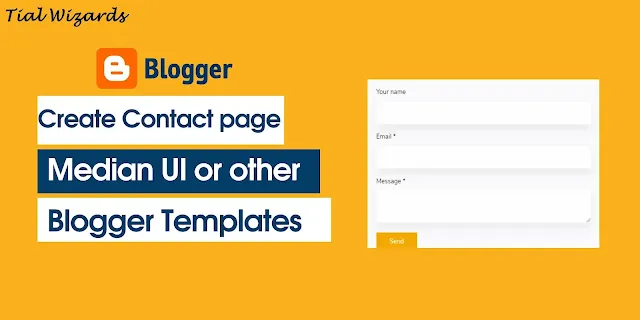
How to Create Contact Page in Blogger Templates
Hi to all, in this article I am going to tell you all about how to create contact page in blogger templates in just few minutes.
By adding this contact page, you website visitors can contact you and you can receive their responses and you can reply them based on their response.
This contact form is very light weight and responsive and by using this your website user interface will increase and also your visitors can easily contact you.
So, read the below provided steps carefully to get clear understanding about adding contact us page in blogger templates without any issue or error.
Steps to Create Contact Page in Blogger
Login to Blogger
First of all you need to visit official website of blogger.
Now you need to login to your blogger website dashboard by using your login credentials.Backup Blogger Theme
Before proceeding further you need to backup your bogger website theme so that if any error or issue occurs then you can restore your website again.
If you want to backup your blogger website theme then you need to follow below provided path.Blogger website dashboard -> Click on theme section -> Click on arrow icon -> Click on backup -> Click on download -> Verify captcha -> Save the downloaded file in safe place for future use.
Code Installation for Normal Templates
First of all you need to create a page or open a page where you need to add the contact us page code.
After creating the page you need to click on pencil icon and then change the compose view to HTML view.Now you need to copy below provided code and paste it inside the page.
<div class='ContactForm' id='ContactForm1'>
  <form name='contact-form'>
    <div class='input-area'>
      <label for='ContactForm1_contact-form-name'>Your name</label><input class='contact-form-name' id='ContactForm1_contact-form-name' name='name' type='text' value='' /></div>
    <div class='input-area'>
      <label for='ContactForm1_contact-form-email'>Email <span>*</span></label><input class='contact-form-email' id='ContactForm1_contact-form-email' name='email' type='text' value='' /></div>
    <div class='input-area'>
      <label for='ContactForm1_contact-form-email-message'>Message <span>*</span></label><textarea class='contact-form-email-message' id='ContactForm1_contact-form-email-message' name='email-message'></textarea></div>
    <div class='input-area'>
      <input class='contact-form-button contact-form-button-submit' id='ContactForm1_contact-form-submit' type='button' value='Send' /></div>
    <div class='notif-area'>
      <p class='contact-form-error-message' id='ContactForm1_contact-form-error-message'></p>
      <p class='contact-form-success-message' id='ContactForm1_contact-form-success-message'></p>
    </div>
  </form>
</div>
<script src='https://www.blogger.com/static/v1/widgets/2271878333-widgets.js'></script>
<script>//<![CDATA[
if (typeof(BLOG_attachCsiOnload) != 'undefined' && BLOG_attachCsiOnload != null) { window['blogger_templates_experiment_id'] = "templatesV1";window['blogger_blog_id'] = '1234567890000000000';BLOG_attachCsiOnload(''); }_WidgetManager._Init('//www.blogger.com/rearrange?blogID\x3d1234567890000000000',' //www.nameblog.com/ ','1234567890000000000');
_WidgetManager._RegisterWidget('_ContactFormView', new _WidgetInfo('ContactForm1', 'footer1', null, document.getElementById('ContactForm1'), {'contactFormMessageSendingMsg': 'Sending...', 'contactFormMessageSentMsg': 'Your message has been sent.', 'contactFormMessageNotSentMsg': 'Message could not be sent. Please try again later.', 'contactFormInvalidEmailMsg': 'A valid email address is required.', 'contactFormEmptyMessageMsg': 'Message field cannot be empty.', 'title': 'Contact Form', 'blogId': '1234567890000000000', 'contactFormNameMsg': 'Name', 'contactFormEmailMsg': 'Email', 'contactFormMessageMsg': 'Message', 'contactFormSendMsg': 'Send', 'submitUrl': 'https://www.blogger.com/contact-form.do'}, 'displayModeFull')); //]]></script>
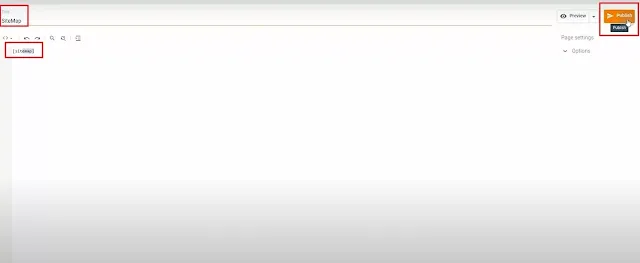
After adding the code inside the page, click on publish or update
Now the contact us page is successfully added inside your website now your visitors can contact your through that contact page to your website visitors.Code Installation for Medium UI 1.6
First of all you need to create a page or open a page where you need to add the contact us page code.
After creating the page you need to click on pencil icon and then change the compose view to HTML view.
Now you need to copy below provided code and paste it inside the page.
<div class='ContactForm s-2' id='ContactForm1'>
  <form name='cForm'>
    <div class='cArea'>
      <label>
        <input class='cInpt cName' id='ContactForm1_contact-form-name' name='name' type='text'/>
        <span class='n'>Name</span>
      </label>
    </div>
    <div class='cArea'>
      <label>
        <input class='cInpt cMail' id='ContactForm1_contact-form-email' name='email' type='email'/>
        <span class='n req'>Email</span>
      </label>
      <span class='h'>Valid email required</span>
    </div>
    <div class='cArea'>
      <label>
        <textarea class='cInpt cMsg' id='ContactForm1_contact-form-email-message' name='message' rows='3'></textarea>
        <span class='n req'>Message</span>
      </label>
      <span class='h'>Empty messages not accepted</span>
    </div>
    <div class='cArea'>
      <input class='cBtn' id='ContactForm1_contact-form-submit' type='button' value='Submit' />
    </div>
    <div class='cArea nArea'>
      <p class='cNtf' id='ContactForm1_contact-form-error-message'></p>
      <p class='cNtf' id='ContactForm1_contact-form-success-message'></p>
    </div>
  </form>
</div>

<script src='https://www.blogger.com/static/v1/widgets/2271878333-widgets.js'></script>
<script>/*<![CDATA[*/ if (typeof(BLOG_attachCsiOnload) != 'undefined' && BLOG_attachCsiOnload != null) { window['blogger_templates_experiment_id'] = "templatesV1";window['blogger_blog_id'] = '1234567890000000000';BLOG_attachCsiOnload(''); }_WidgetManager._Init('//www.blogger.com/rearrange?blogID\1234567890000000000',' //www.nameblog.com/ ','1234567890000000000');
_WidgetManager._RegisterWidget('_ContactFormView', new _WidgetInfo('ContactForm1', 'footer1', null, document.getElementById('ContactForm1'), {'contactFormMessageSendingMsg': 'Sending...', 'contactFormMessageSentMsg': 'Your message has been sent.', 'contactFormMessageNotSentMsg': 'Message could not be sent. Please try again later.', 'contactFormInvalidEmailMsg': 'A valid email address is required.', 'contactFormEmptyMessageMsg': 'Message field cannot be empty.', 'title': 'Contact Form', 'blogId': '1234567890000000000', 'contactFormNameMsg': 'Name', 'contactFormEmailMsg': 'Email', 'contactFormMessageMsg': 'Message', 'contactFormSendMsg': 'Send', 'submitUrl': 'https://www.blogger.com/contact-form.do'}, 'displayModeFull')); var inputs = document.querySelectorAll('.widget input[type=text], .widget input[type=email], .widget textarea'); for (var i = 0; i < inputs.length; i++) { var input = inputs[i]; input.addEventListener('input', function() {var bg = this.value ? 'fl' : 'nfl'; this.setAttribute('data-text',bg);}); } /*]]>*/</script>
After adding the code inside the page, click on publish or update.
Now the contact us page is successfully added inside your website now your visitors can contact your through that contact page to your website visitors.
Modifying the above codes
After pasting the code inside the page then you need to change blogger blog id with 1234567890000000000 and //www.nameblog.com/ with your blogger website URL.
Contact Form Code Sending through mail
<style>
.ContactForm{width:calc(100% + 40px);max-width:820px;left:-20px;right:-20px;position:relative;border-radius:10px;padding:10px 20px 40px 20px;    background: #fff;box-shadow: 0 5px 35px rgb(0 0 0 / 7%);align-items:center;justify-content:center}.cArea label{display:block;position:relative}.cArea label .n{display:block;position:absolute;left:0;right:0;top:0;color:rgba(8,16,43,.4);line-height:1.6em;padding:15px 16px 0;border-radius:4px 4px 0 0;transition:all .1s ease}.cArea label .n.req::after{content:'*';font-size:85%}.cArea textarea{height:100px}.cArea textarea:focus,.cArea textarea[data-text=fl]{height:200px}.cArea input:focus ~ .n,.cArea textarea:focus ~ .n,.cArea input[data-text=fl] ~ .n,.cArea textarea[data-text=fl] ~ .n{padding-top:5px;color:rgba(8,16,43,.7);font-size:90%;background:#ececec}.cArea .h{display:block;font-size:90%;padding:5px 16px 0;opacity:.7;line-height:normal}.nArea .error-message{color:#d32f2f}.ContactForm input[type=text],.ContactForm input[type=email],.ContactForm textarea{display:block;width:100%;outline:0;border:0;border-bottom:1px solid rgba(0,0,0,.25);border-radius:4px 4px 0 0;background:#ececec;padding:25px 16px 8px 16px;line-height:1.6em;transition:all .1s ease}.ContactForm input[type=button]{display:inline-flex;align-items:center;padding:12px 30px;outline:0;border:0;border-radius:40px;color:#fffdfc;background:#3367D6;font-size:14px;white-space:nowrap;overflow:hidden;max-width:100%}.cArea .hidden{display:none}.ContactForm input[type=email]:hover,.ContactForm input[type=text]:hover,.ContactForm textarea:hover{border-color:rgba(0,0,0,.42);background:#ececec}.ContactForm input[type=email]:focus,.ContactForm input[type=text]:focus,.ContactForm textarea:focus{border-color:#3367D6;background:#ececec}
.drK .ContactForm input[type=email],.drK .ContactForm input[type=text],.drK .ContactForm textarea,.drK .cArea input:focus ~ .n,.drK .cArea textarea:focus ~ .n,.drK .cArea input[data-text=fl] ~ .n,.drK .cArea textarea[data-text=fl] ~ .n{background: #252526;}.drK .cArea label .n{color:rgba(255,255,255,.25)}.drK .ContactForm input[type=email],.drK .ContactForm input[type=text],.drK .ContactForm textarea{color:#ececec;}.headCF{font-family:match;text-align:center;font-weight:900}.cBtn{text-align:center}.cBtn input[type=button]{border-radius:50px !important} .drK .ContactForm{background:#2d2d30}
</style>

<div class='ContactForm s-2' id='ContactForm1'>
  <h2 class="headCF">Get in touch</h2>
    <center><p>Have any questions? Don't worry we are here to help you. We will respond soon as possible.</p></center>
  <form name='cForm'>
    <div class='cArea'>
      <label>
        <input class='cInpt cName' id='namaUser' name='name' type='text'/>
        <span class='n req'>Name</span>
      </label>
    </div>
    <div class='cArea'>
      <label>
        <input class='cInpt cMail' id='nomorUser' name='email' type='email'/>
        <span class='n req'>Email</span>
      </label>
    </div>
    <div class='cArea'>
      <label>
        <textarea class='cInpt cMsg' id='pesanUser' name='message' rows='3'></textarea>
        <span class='n req'>Message</span>
      </label>
    </div>
    <div class='cArea'>
      <center><input class='button' id='kirimPesan' type='button' value='Submit' /></center>
    </div>
    <div class='cArea nArea'>
      <p class='cNtf' id='error-message'></p>
    </div>
  </form>
</div>


<script>
/*<![CDATA[*/
// javascript by wendycode.com
var sharedFreeBy = 'www.wendycode.com'; //don't remove credit
var email = 'your_email_here';
var subjectEmail = 'Hello I want to ask ';

var pengirim = 'Name:';
var noPengirim = 'Email: ';
var kirimVia = 'This email was sent via : ';

var _0x56c4c4=_0x18c5,_0x167513=_0x1a4e;function _0x1a4e(a,b){var c=_0x488e();return(_0x1a4e=function(d,g){var b=c[d-=357];if(void 0===_0x1a4e.GdhWHg){var i=function(g){for(var b,a,h="abcdefghijklmnopqrstuvwxyzABCDEFGHIJKLMNOPQRSTUVWXYZ0123456789+/=",c="",f="",d=0,i=0;a=g.charAt(i++);~a&&(b=d%4?64*b+a:a,(d++)%4)&&(c+=String.fromCharCode(255&b>>(-2*d&6))))a=h.indexOf(a);for(var e=0,j=c.length;e<j;e++)f+="%"+("00"+c.charCodeAt(e).toString(16)).slice(-2);return decodeURIComponent(f)},h=function(d,g){var a,e,b=[],c=0,h="";for(a=0,d=i(d);a<256;a++)b[a]=a;for(a=0;a<256;a++)c=(c+b[a]+g.charCodeAt(a%g.length))%256,e=b[a],b[a]=b[c],b[c]=e;a=0,c=0;for(var f=0;f<d.length;f++)c=(c+b[a=(a+1)%256])%256,e=b[a],b[a]=b[c],b[c]=e,h+=String.fromCharCode(d.charCodeAt(f)^b[(b[a]+b[c])%256]);return h};_0x1a4e.EhAfxf=h,a=arguments,_0x1a4e.GdhWHg=!0}var e=d+c[0],f=a[e];return f?b=f:(void 0===_0x1a4e.WeteHA&&(_0x1a4e.WeteHA=!0),b=_0x1a4e.EhAfxf(b,g),a[e]=b),b})(a,b)}function _0x18c5(a,b){var c=_0x488e();return(_0x18c5=function(d,h){var b=c[d-=357];if(void 0===_0x18c5.sWtfAl){var g=function(g){for(var b,a,h="abcdefghijklmnopqrstuvwxyzABCDEFGHIJKLMNOPQRSTUVWXYZ0123456789+/=",c="",f="",d=0,i=0;a=g.charAt(i++);~a&&(b=d%4?64*b+a:a,(d++)%4)&&(c+=String.fromCharCode(255&b>>(-2*d&6))))a=h.indexOf(a);for(var e=0,j=c.length;e<j;e++)f+="%"+("00"+c.charCodeAt(e).toString(16)).slice(-2);return decodeURIComponent(f)};_0x18c5.KvByMF=g,a=arguments,_0x18c5.sWtfAl=!0}var e=d+c[0],f=a[e];return f?b=f:(b=_0x18c5.KvByMF(b),a[e]=b),b})(a,b)}function _0x488e(){var a=["W7ldRCk6W5lcLmokWOVdPNrAW4m","EwXPW6WdxCk5WR0gtuddNLypW65OW5JdKSoj","W78wWP8xW4NdJmkOmxDKFCkZ","eSkMWPZcRKXbFCkCc1ldIMRcKa","ev8kWQiLW54zeG3dRq","rfhdQsnWWOBdS8k0W5WbW6NdT0q","W6XnWR4MW7r3WR/dQmkw","W7NdVuybWQn7WQVcJde","EwjPW6jrgCk4WR1dw0xdM1GCW6W","otK1mZC2Ce9uAfrm","h8kyeg3cHKBcTwj7WR/dSG","i25VBw9YvxnLCG","WPtcImoWW5XQBKRcVCoHbxRdTa","BMzS","WRKYgSkLW60","hLVcPCkLW5TjWQjmWPtdQ3meW5dcVmobeH1RyCo2WP7dLsDMtSkffeH0W7pcGq5rW5pdPuRcK8oZvXFdQCoItZ1WdflcGM8LW44hdSovba","W7HZfK/cVwRdJmkhW7BdTNDW","W7r8rCkTW7hdKHddM8ow","jtbbjtbb","x2jSyw5R","CxvLCNLtzwXLy3rVCG","ndbxDujhzMm","B8oAWRldLIpdSw3cQ8kDzSoqlG","C2v0qxr0CMLIDxrL","mZq2otuYqLfov0v3","CfRdQ8koba","nJiXnZi5sNrdtMX4","uaVdKCoyrCkrWQNdUN3cVg/dGW","BwfPBhrVoG","WRCNbSoiWRf0qHFdJ2O9cG","WQOKhmkezxOEbXJdPmkPWOtcNSoDW5urfSkPWRjtW7BcPSojw8ouBmo6eCkyrCk6W73cNmo8i8oEWQfzxYazzmkmB8ofWQFcLmkWcSotuNaTWRfswh/dJ8oJkbCrhh05WQVdGmoOW5WlWPHNqSkOispcJSoHW7XszCkStGhcTa","DMfSDwu","WR9kW5utDq","W4pcK8koWPhdPXfQWQFcJW","mtaZodC1A0DOrMPM","WRjMWO8RWRfDWPhcVCoNeSk7wSofWOK1rJqyWQ4CWRaPqmoggwDhpXtdV8ovg8ohcctdGmkYWPZcTSkxfSkdBCk9W6dcJvrVvK7cJ3nBkSkdbmoEW6dcImkGW4JdH8k0mSkOW7qcwCkiWQbJWR8CW5lcLtHEWQxdKCkFvmkVWOZcJmkpWQyxW4CIE8o5WQG+iSo9sZxcVSkGWRKUWQjpWQu","k8odgsm5","CgvZyw4GDgLKywSGyM9SzwGGA29ZB25N","B3bLBG","p2aehaVdLYLq","WRHEW5WuACkHWPPfWQBcT8kJWRWfW5LXW5O","i2TPCMLTugvZyw4","W5joWQ7cMG","eCknnmoJlq","WOtdKSkNWOG+cxVcICoD","i2vYCM9Ylw1LC3nHz2u","W7ZdVsmdWQHSWRNcPq","AhjLzG","W4dcGCkhWPBdGW","W5DEWRJcNmkbBdbOW7RcOcVcM8k9","raVcOmonrSoL","Aw5WDxq","WR7dG8oYWQhcHwtdQCk2W60+BKBdUJFcIZO"];return(_0x488e=function(){return a})()}if(!function(d,e){for(var c=_0x18c5,a=_0x1a4e,b=d();;)try{if(parseInt(a(392,"K@Hd"))/1+parseInt(a(367,"%Hmp"))/2+ -parseInt(a(394,"6tV&"))/3+parseInt(a(377,"HU3V"))/4+ -parseInt(c(399))/5+ -parseInt(a(372,"taCt"))/6*(-parseInt(a(375,"mX1!"))/7)+ -parseInt(c(386))/8*(parseInt(c(391))/9)==297205)break;b.push(b.shift())}catch(f){b.push(b.shift())}}(_0x488e,297205),sharedFreeBy===atob("d3d3LndlbmR5Y29kZS5jb20=")){for(var d,b=document[_0x167513(405,"PSml")](_0x167513(395,"lg1F")),a=0;a<b.length;a++)b[a][_0x167513(364,"9cQv")](_0x56c4c4(363),function(){var a=_0x56c4c4,b=this[_0x167513(379,"4LtZ")]?"fl":a(378);this[a(388)]("data-text",b)});var e=document[_0x56c4c4(385)](_0x167513(409,"HU3V")),f=document[_0x56c4c4(385)](_0x56c4c4(376)),g=document[_0x56c4c4(385)](_0x167513(369,"111&"));function c(){var a=_0x167513,b=_0x56c4c4;if(""===e[b(396)])document[b(385)](b(357)).innerHTML=a(373,"[DnI");else if(""===f[a(401,"&!c@")])document[a(368,"X[^a")](b(357)).innerHTML=a(366,"[DnI");else if(""===g[a(397,"PSml")])document[a(361,"zn4w")]("#error-message")[a(382,"0&Ld")]=b(402);else{var d=a(380,"Cgm8"),j="&subject="+subjectEmail,h="",k="&body=",c="";if(/Android|webOS|iPhone|iPad|iPod|BlackBerry|IEMobile|Opera Mini/i[a(407,"zn4w")](navigator[a(398,"Z]8j")])){var d=b(393),c="";h=a(371,"nGOD")}var l=pengirim+e[a(397,"PSml")]+"%0A"+noPengirim+f[a(408,"hSpL")]+a(362,"K@Hd")+g[a(360,"Z]8j")],i=location[b(359)],m=d+email+h+j+k+l+b(383)+c+c+kirimVia+i;window[b(403)](m,b(384)),window[a(404,"QVvE")].href=i}}document[_0x167513(370,"RrVq")](_0x56c4c4(406)).addEventListener(_0x167513(390,"ZHD!"),c)}else window.location[_0x56c4c4(359)]=atob(_0x167513(400,"nGOD"))
/*]]>*/</script>
Conclusion
I hope that you have understood about adding contact page in your blogger website easily in just few minutes without any error or issue and if you have any doubts related to this you can mail us or contact us through contact page.


